
Hi everyone! While many people are searching for free graphic design software, most options either come with hidden costs or lack essential features and templates. However, with Thumbzstudio, you can create stunning gaming thumbnails at no cost. In this step-by-step guide, we’ll show you how to design an eye-catching YouTube gaming thumbnail template using Thumbzstudio.
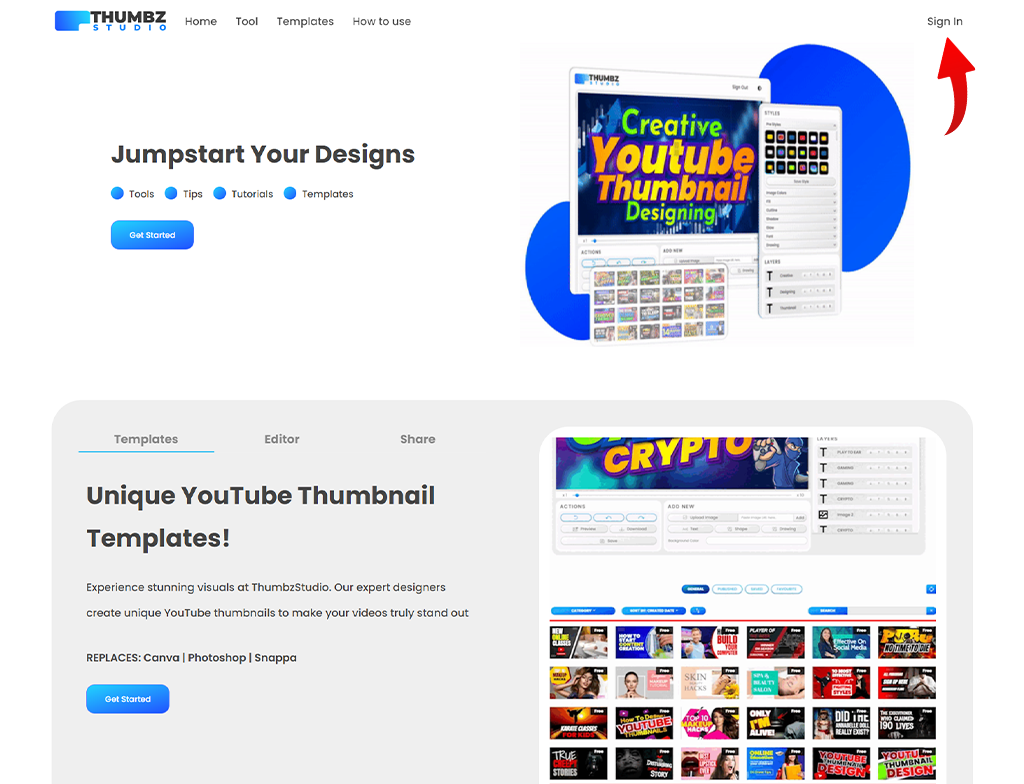
When you visit Thumbzstudio, you’ll be greeted by an impressive interface. To get started, you’ll need to sign up using your Google account, which takes just a minute. Look for the “Sign In” button in the top right corner of the screen. Signing in is essential before you can access the hundreds of free templates available.
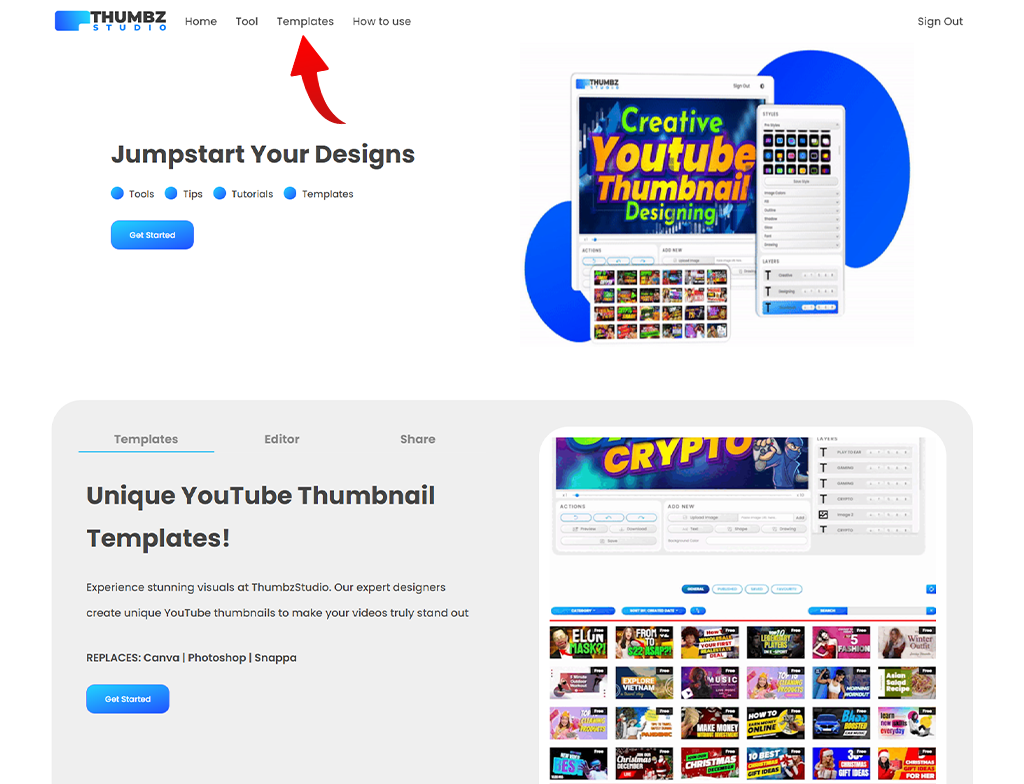
Once you’re signed in to Thumbzstudio, navigate to the “Templates” section. Here, you’ll find over 1,000 free templates available for use. Explore a wide variety of stunning gaming thumbnails that you can customize for your needs.
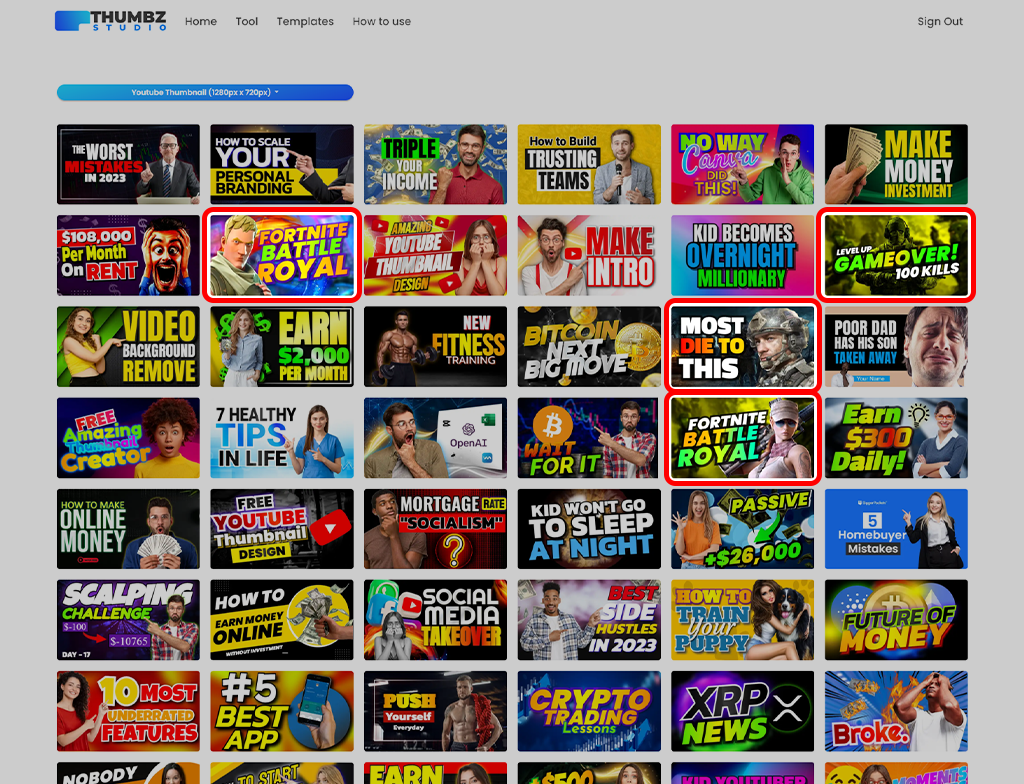
All of these templates are designed by highly experienced graphic designers and are among the best high-CTR (Click-Through Rate) options available for YouTubers. These templates adhere to YouTube’s guidelines and are completely copyright-free, making them suitable for anyone to use for their thumbnails.
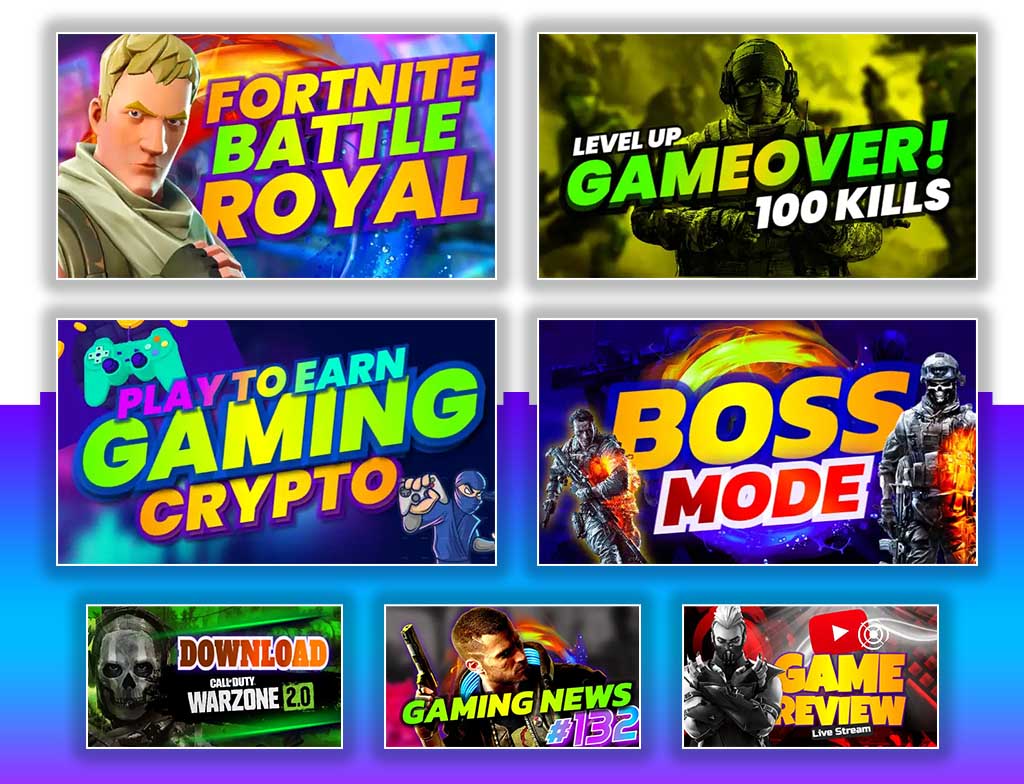
In the image, I’ve highlighted some of the standout gaming thumbnails that I found while browsing through the YouTube thumbnail template section on Thumbzstudio. You’ll find pre-designed templates specifically for Fortnite, military or war games, and colorful gaming themes. Additionally, you can choose other templates and customize them to fit your needs. All templates are fully editable, allowing you to make as many adjustments as you require.
Load More Templates with Ease
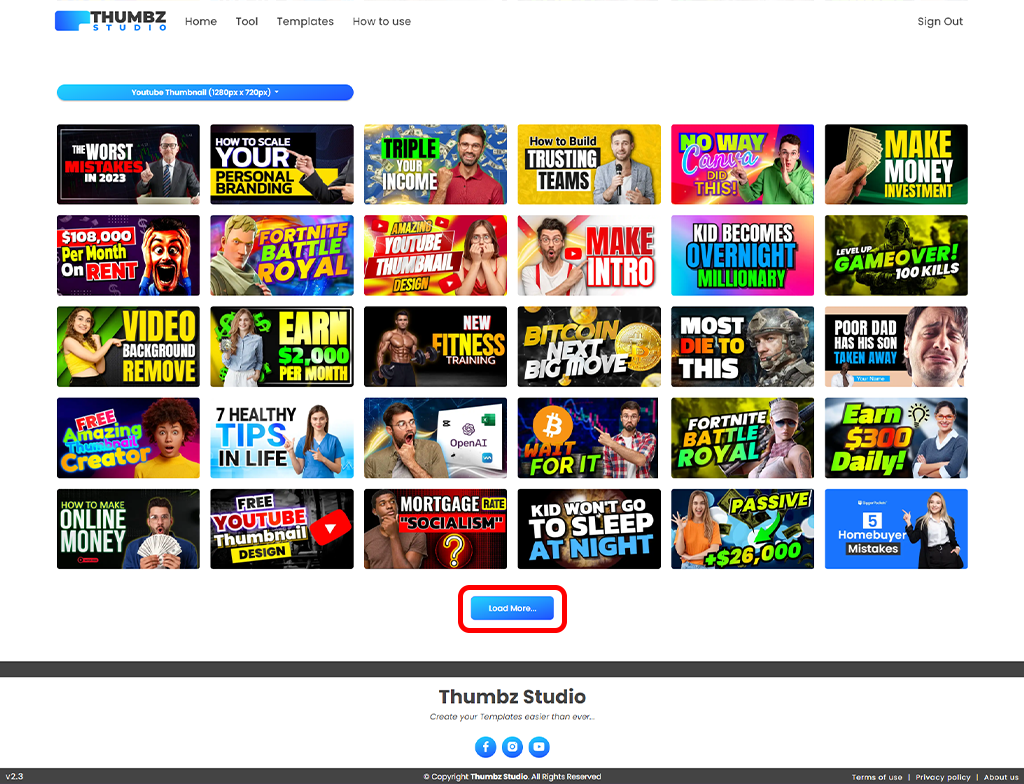
While browsing the template page, as you scroll down, you’ll notice a “Load More” button at the center of the page. Clicking this allows you to access an extensive library of over a thousand templates available on ThumbzStudio. These templates cover a wide range of categories, including crypto, gaming, blogs, fitness, education, social media marketing, business, sports, cars, and many more. With around a hundred categories to explore, you’re sure to find the perfect template. If you prefer to create something unique, ThumbzStudio also offers the option to start with a blank canvas.
Choosing a Gaming Template
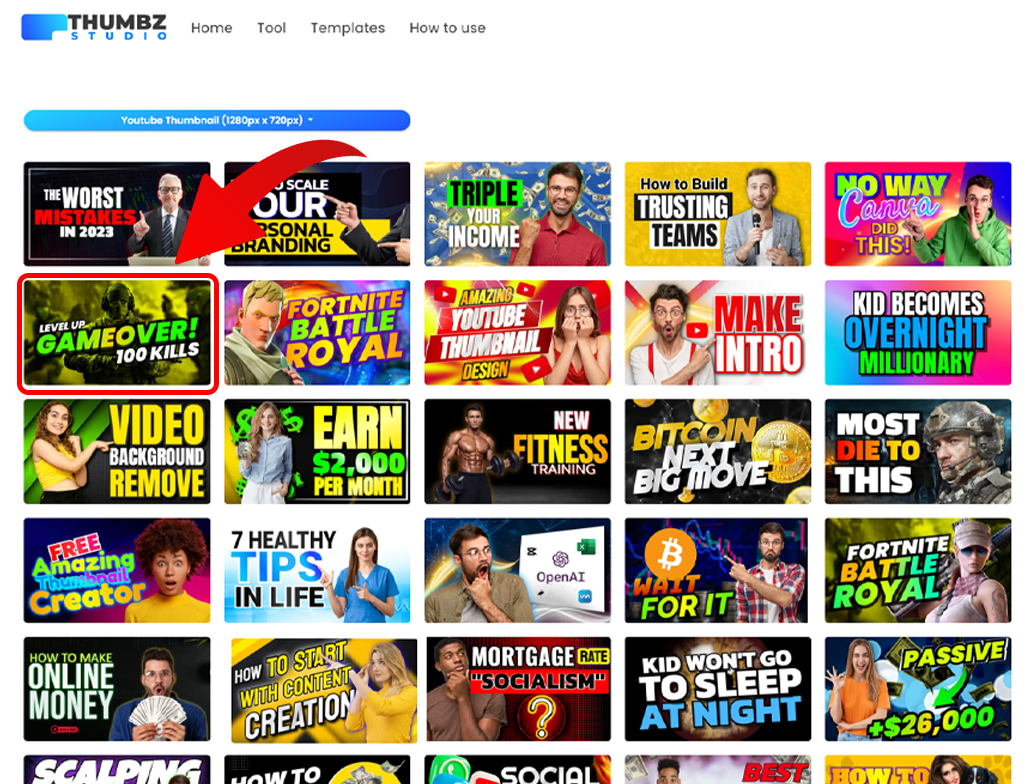
I decided to select this gaming template because of its awesome military theme—it’s exactly what I was looking for! You can choose any template that suits your style. Simply click on the template you like, and you’ll be redirected to a new page where you can start customizing.
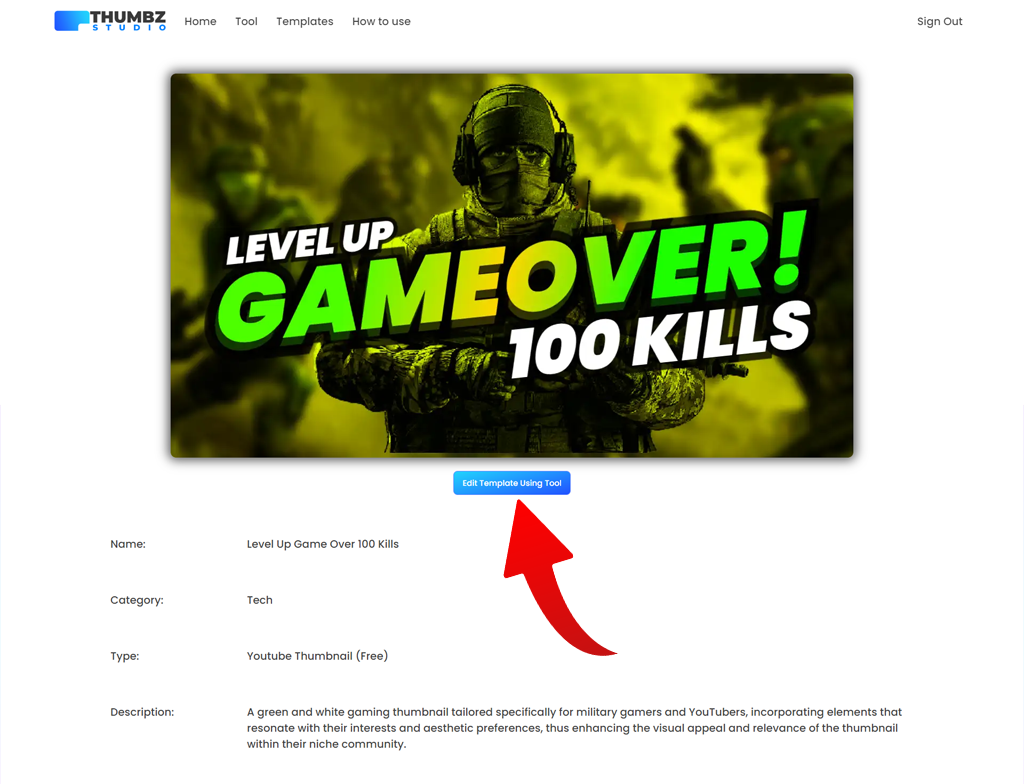
Template-Specific Pages for Easy Editing
Each template has its own dedicated page. When you visit this page, you’ll notice a blue button labeled “Edit Template Using Tool.” Clicking this button will redirect you to the ThumbzStudio editor, where your chosen YouTube thumbnail template will be loaded onto the canvas. Additionally, you’ll find more details about the template, including its name, category, and a brief description.
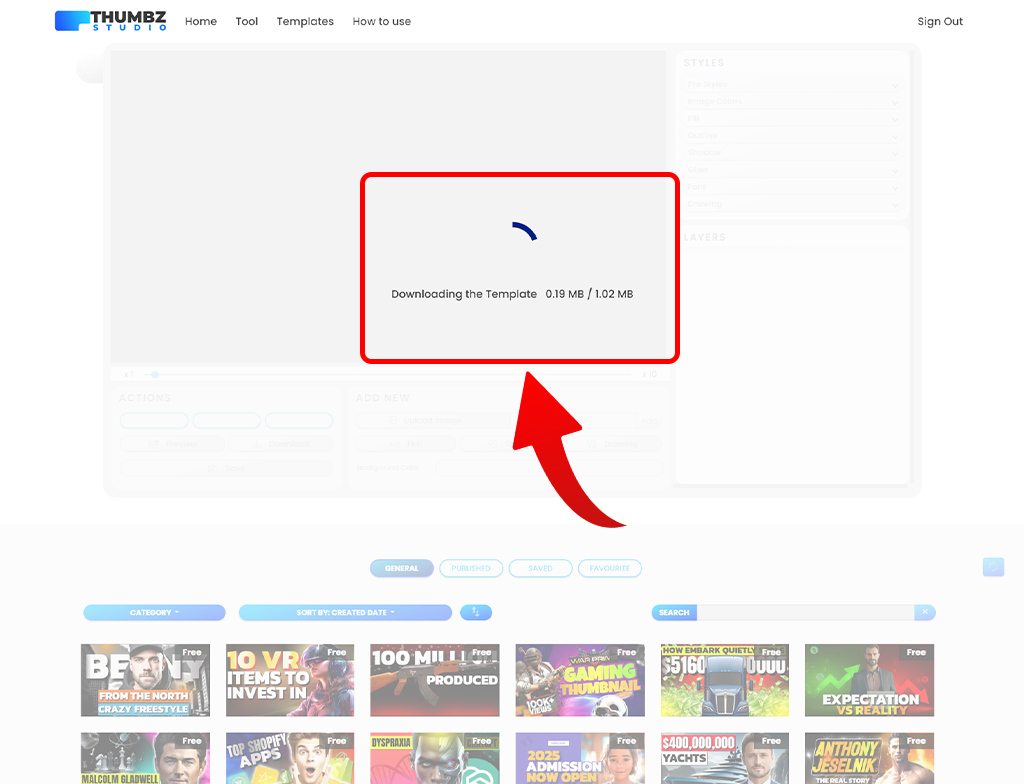
Loading the Template onto ThumbzStudio Canvas
After clicking “Load Template,” wait a few seconds for the thumbnail to load onto the ThumbzStudio canvas. The loading time may vary depending on the size of the thumbnail, but it typically only takes a few seconds.
Understanding the ThumbzStudio Interface
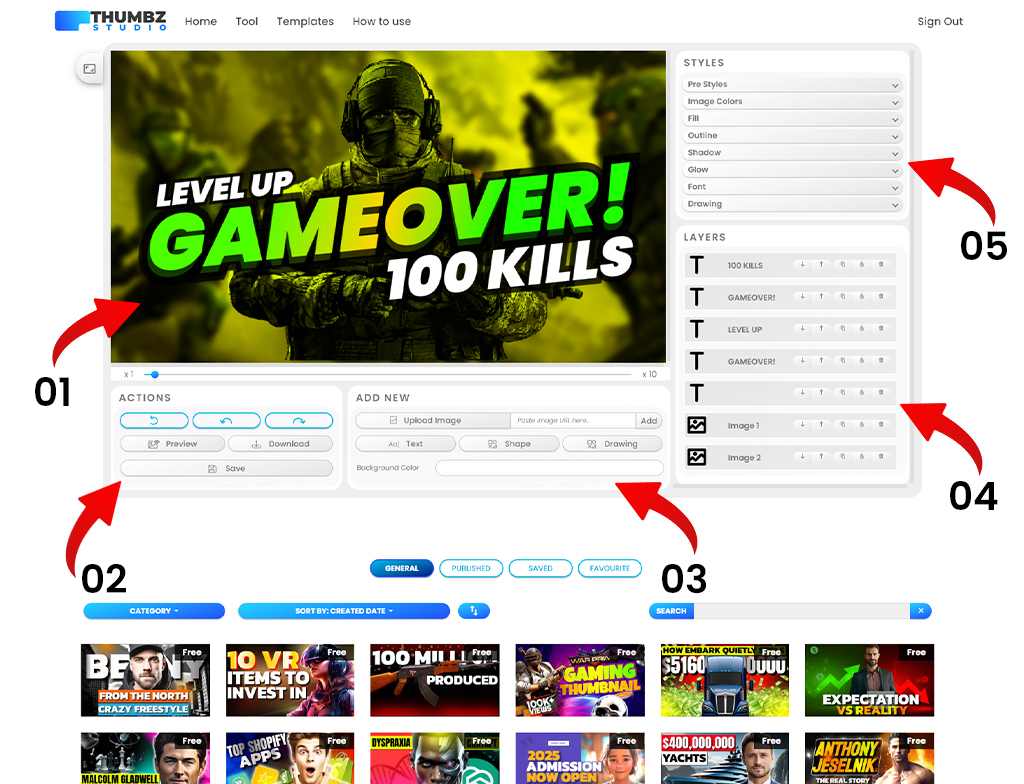
Once your thumbnail is loaded onto the canvas, you’ll see several key sections within the ThumbzStudio interface:
- Canvas Area: This is where you can create and customize your design. You can move, delete, and add text, images, shapes, and more. The interface is incredibly user-friendly, similar to using Microsoft Word, making it easy to design something awesome.
- Action Buttons: Located at the top, these buttons include Reset, Undo, and Redo functions. The Preview button lets you preview your thumbnail before downloading, and the Download button allows you to save your design directly to your computer. The Save button stores your design in your personal saved template section for future use.
- Add New Section: In this section, you can upload images or add them via URL. You can also use the copy-and-paste method—simply copy an image from your browser and paste it directly onto the canvas. Additionally, you can add text, shapes, or even draw directly on the canvas. You can also change the background color of the canvas.
- Layer Management: Here, you can move layers up or down, bringing them forward or sending them backward. You can adjust layers directly on the canvas or use the layer panel, where you can also duplicate layers with a single click.
- Layer Style Editing: This section offers a variety of options to edit and style your layers. There’s a wealth of features here, so take your time exploring and experimenting with different effects to enhance your layers and photos.
Exploring the Interface: Canvas, Zoom, and Size Options
In the image above:
- Section A represents the canvas where you can edit text, move photos, delete elements, and customize your design to your liking. You have complete creative control in this area.
- Section B allows you to zoom in and out of the canvas, giving you a closer or broader view of your design.
- Section C provides options to reset the canvas, start with a new canvas, or choose a different size, such as for Facebook ads, Instagram posts, or any custom dimensions you need.
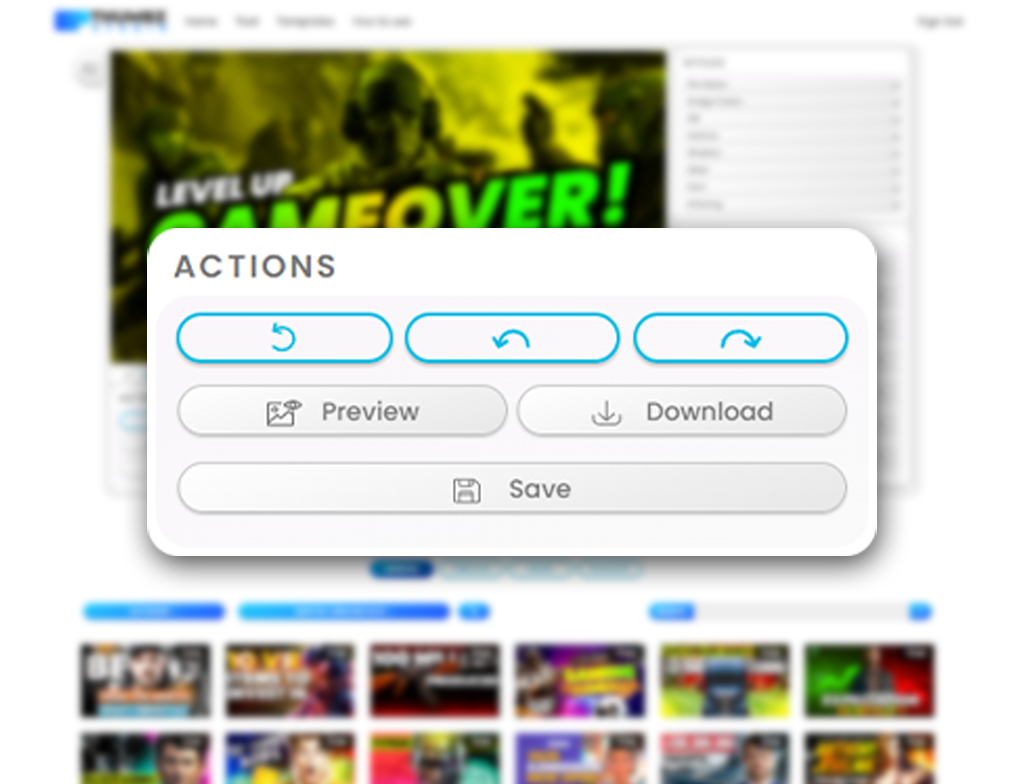
Action Buttons: Reset, Undo, Preview, and Save
As mentioned earlier, the action buttons provide several key functions:
- Reset: Clears the canvas, allowing you to start fresh.
- Undo/Redo: Easily revert or repeat your last actions.
- Preview: View your design before downloading to ensure it’s perfect.
- Download: Save your design directly to your PC or Mac with a simple click.
The Save button allows you to store your design in your ThumbzStudio profile, so you can reload and edit it later. Free users can save up to five designs, premium users up to 50 templates, and platinum users have unlimited design storage.
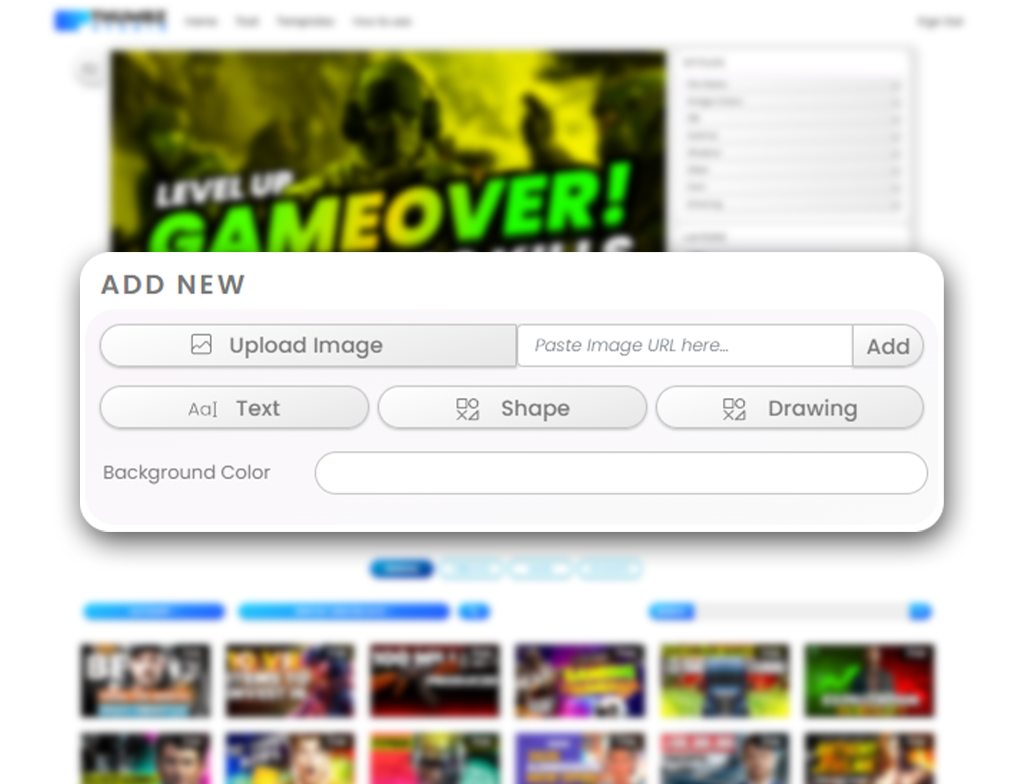
Add New Section: Upload, Paste, and Customize
In the “Add New” section, you can upload images directly from your PC or Mac. You also have the option to paste an image URL, which will instantly add the image to your canvas. As explained earlier, you can also copy an image from anywhere on the web and paste it directly onto the canvas.
In addition to images, you can add text layers by clicking on the “Add Text” button, or you can add various shapes like rectangles, triangles, and custom shapes using the shape tool. The drawing tool allows you to create freehand designs, and you can easily change the canvas background color using the background color option.
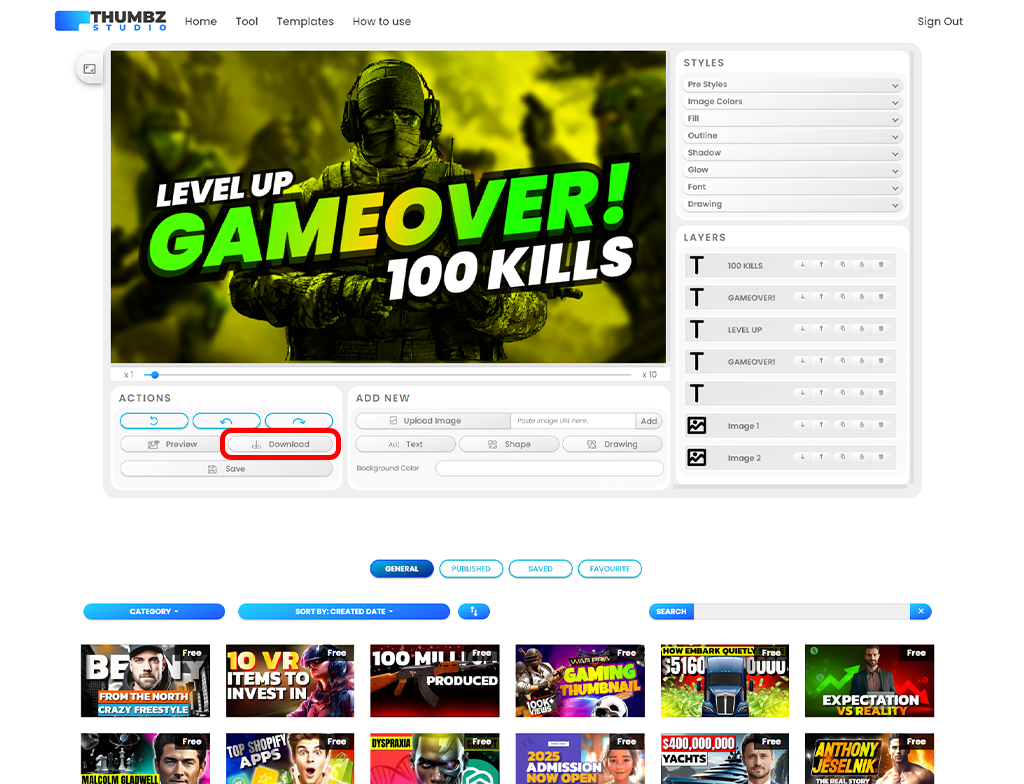
Finalizing and Downloading Your Design
After creating your design using ThumbzStudio, you can customize the styles, fonts, and colors of the text to fit your preferences. In the upper right corner of the interface, you’ll find the “Styles” section where you can adjust font styles and other design elements.
Once you’re satisfied with your thumbnail, click the “Download” button. Your thumbnail will be downloaded to your computer within a few seconds. If needed, you may be redirected to a new page where you can download the file from there.
I hope this guide has been helpful. Feel free to create as many thumbnail designs as you like—ThumbzStudio is completely free to use. In a future article, I’ll cover how to design thumbnails in different categories using ThumbzStudio.